Best way to make coffee at home: Get rid of those pod machines and try this cheap method!
The age of coffee-pod machines is, thankfully, coming to an end. TAG24 is here to show you the best way to brew coffee at home cheaply and easily, without the need for insane amounts of waste!

It's time to ignore George Clooney, throw off the shackles of plastic consumerism, and dive into a vat of coffee that's hot, delicious, and far better for the environment!
Pod coffee is unnecessary, way too expensive, and not particularly good anyway. What other options do we have, though? Well, it's time to go a little low-tech.
It's time to learn how to make far-better coffee cheaply, quickly, and easily. Food ain't the only thing that's important in the morning, a new brew is just as crucial, so here's the best way to make coffee at home!
Why are coffee pods a waste of time and money?
There are so many reasons to avoid coffee pod machines that it could get a little tedious to list and explain them all. In summary, coffee pods are insanely expensive, don't taste particularly great, and can be seriously environmentally wasteful. Ultimately, there are really no up-sides other than the fact that they are rather fast.
Speed is something that you can achieve either way, though, with other forms of coffee never really taking more than maybe five minutes to brew. What's more, coffee pods are extremely expensive, having to purchase machines that generally sell for around $100, and certain sets of pods only working with certain models, and also rather expensive.
Other forms of coffee are cheaper, allow more diversity in the coffee you want to consume, are far better for the environment, and taste way, way better. Here's the secret...
What is the best way to brew coffee at home?
Of course, proper espresso machines are always going to be the best, but few people have a thousand bucks to throw around. Instead, you can make delicious cappuccinos for only a fraction of that price. While these methods aren't perfect, they'll still please your taste buds, wallet, and planet.
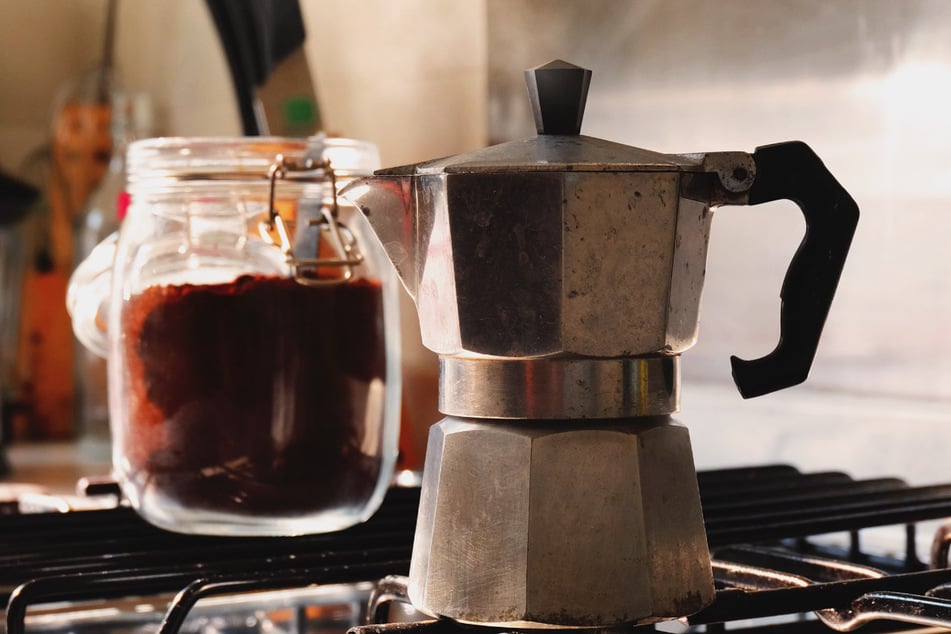
By far the best way to brew coffee at home is using an Italian moka pot (also known as a percolator). These pots use pressure to push steam through a filter filled with coffee.
If done correctly (we'll get into that below), moka pots can actually produce an incredibly well-balanced and tasty brew. The coffee produced is, generally, far better than anything you'll get from a pod machine, and once you have picked one of these cheap devices up, the only expense will be the beans.
The French press question: Many people swear by the French press, many even claiming that it is the best home coffee making method out there. It's true, French presses do come with their advantages. They are cheap, can produce a relatively good coffee, and are incredibly portable.
The problem, though, is that the French press produces a brew that is generally far more bitter and acidic than an Italian moka. On top of that, the coffee can get rather gritty due to grounds slipping into the coffee. It's also incredibly annoying to clean!
How do moka pots work?
One of the reasons why moka pots produce such high quality coffee is that they use high levels of pressure for extraction. There are free main parts to this machine: the water tank (which contains a safety valve to relieve pressure), the filter basket, and the upper chamber (where the coffee is collected.)
Basically, water is added to the tank and the filter basket is filled with ground coffee beans. The device then gets put onto the stove top, where the water is boiled. As the water boils, it converts into steam, which then becomes pressurized. The pressure pushes the steam through the coffee grind. As the steam gets pushed through it cools down and condenses, collecting the coffee flavor and depositing itself in the upper collection chamber as, well, liquid coffee.
Extremely important: You need to keep in mind that, while moka pots work in a very similar way to espresso machines, they work with far less pressure. As a result, you shouldn't grind your coffee beans as finely as you would for espresso coffee.
Keep the grains a little more coarse. If you don't, the steam will have trouble escaping and the machine will squeal like a kettle. This is why that safety pressure valve is so important - otherwise, it could very well end up exploding like a bomb.
In other words, don't buy a percolator without a safety valve. They are seriously dangerous.
How to make the best coffee at home
So let's take a look at how you should use your moka pot to make the best coffee at home. It's not just a matter of smashin' it all together, popping it on the stove, and hoping for the best. You can, of course, do that, but you won't get the absolute best coffee you can out of this machine.
Here's how to make the best moka pot coffee:
Step 1: Boil your water before putting it in the machine to start pre-infusion. By boiling it separately, the temperature will drop to around 180-190° Fahrenheit. This will mean that you will get a faster brew, the temperatures will be better for extraction, and you'll get a more fully extracted and tastier coffee. Just be careful that you don't burn yourself!
Step 2: Fill the filter basket all the way up to the top. These machines are designed so that you generally have a 10:1 ratio of water to coffee when it is filled, making it unnecessary and unwise to mess around with this dichotomy. Once filled, give the basket a little tap to settle the ground coffee.
Step 3: Put the device all together and place it on the stove top at a medium-low heat. While it brews, keep its lid open and pay attention to it.
Step 4: The real difference between a moka pot pro and a moka pot Joe is that the latter will use the spluttering phase at the end of brewing as a sign that it is done. If you really want a good coffee, though, you should avoid this phase all together.
Step 5: Keep in mind that if the water is boiling too fast and too much pressure is amassing in the pot, uncondensed steam will start coming up through the coffee as it pours into the collection chamber. This will add a lot of bitterness to the coffee that you don't want.
Step 6: There are two ways to deal with this. The first is that, if it begins to happen, run the bottom chamber under a little bit of cold water for a while to reduce the temperature. To avoid this situation all together, you should use the pick-up, put-down method.
Step 7: You want to keep the temperature hot enough to keep the steam pushing condensed water through the coffee, but not so hot that the above scenario starts. Put it on a low heat and watch the top of the pot. As soon as liquid starts coming through, move it to the side of the hot plate or lift it up. Keep the flow steady, and keep picking it up and putting it down to maintain the brew stream and the temperature without it gurgling.
Step 8: Once it is finished, decant it into a mug straight away. You don't want it to sit in the pot for too long, as the extremely hot metal will also affect the flavor.
This is a technique that can become highly technical and specific. It works extremely well, though, and will yield an unbelievably flavorful coffee. If you want more of a breakdown of the science and technique, though, we recommend this great tutorial from James Hoffmann...
How to make iced coffee at home: Step-by-step
Iced coffee is an absolute staple of summer life. Instead of overheating ourselves with a good ol' cap, or a silky smooth latte, we can cool ourselves down with a nice, sweet, delicious iced coffee. The problem, though, is that most coffee shops absolutely rip you off. Here's how to make one yourself cheaply and easily...
Let's be real, this one's pretty straight-forward: Make a moka coffee as we have described, decant it into a mug and set that aside in the fridge overnight. Once it has cooled down, add ice, some milk (or substitute milk), a teaspoon of sugar, and ice cream (or substitute ice cream).
How to make cappuccino at home
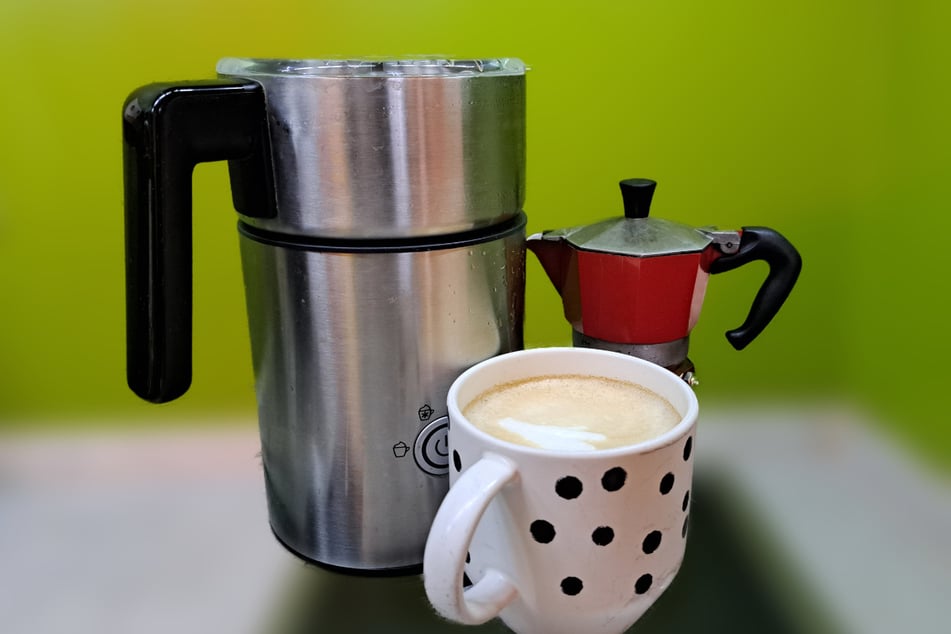
You can easily make a cappuccino at home with the use of a simple milk frother and a moka pot. Use the same method as described above to make your coffee and then decant it into a large mug. While the coffee is brewing, place milk into a frothing machine and set it to on.
Once the coffee is decanted and the milk has finished frothing, it's time to make your cappuccino. Simply swirl the milk so that it picks up all the foam. Continue to swirl, changing the direction and allowing to combine the heated liquid milk with the foam until creamy.
To construct the cappuccino, pour the milk slowly into the coffee, putting the mug on a tilt and drawing a circle around the edge with your pouring milk. Now do a little squiggle and go through the center when you get to the end of the milk.
Keep in mind: You are never going to be making serious latte art with a milk frother that introduces air to the milk via spinning, as the bubbles will be far too big. For proper art you will need to steam the water at a high pressure.
Brew coffee at home to save money and the environment!
Yes, multiple well-known coffee pod companies are now using biodegradable plastics. Yes, any coffee has its own environmental impact, but: Anything you can do makes a little bit of a difference, right? If you use a percolator, then you use one (usually paper or foil) packet per pound!
Oh, and did we mention that a pound packet of pre-ground espresso is like $5-10? Even with inflation? Yeah, and you get way, way more coffees out of this than your average pod packet. In other words, save money, save the environment, and save your taste buds, using this coffee-making-method.
Come on, guys, it's a no-brainer. Get yourself a percolator for like $30 and put your Italian hats on. You won't regret it!
Cover photo: Nathan Dumlao / Unsplash
